Twinsen's Odyssey, originally released as Little Big Adventure 2 in 1997, is an eccentric adventure game that had a lasting impact on me, from its exceptional soundtrack to the wacky story. Every couple of years I'm used to doing a playthrough, but this time I had something different in mind.
With the release of the Little Big Adventure Symphonic Suite, I felt the need to give back to the amazing community that still surrounds this game. That's how this project began: making it possible to import the game's 3D models and animations into a modern game engine like Unity, opening the door for new fan-made creations.
The approach was the easiest part, as there's no need to reinvent the wheel. Using a scriptable 3D modeling tool to extract and process the data, then exporting the final files as .fbx or .obj, was the obvious choice.
Anatomy of a 3D model
Before going further, let's quickly break down what needs to be extracted to rebuild the models:
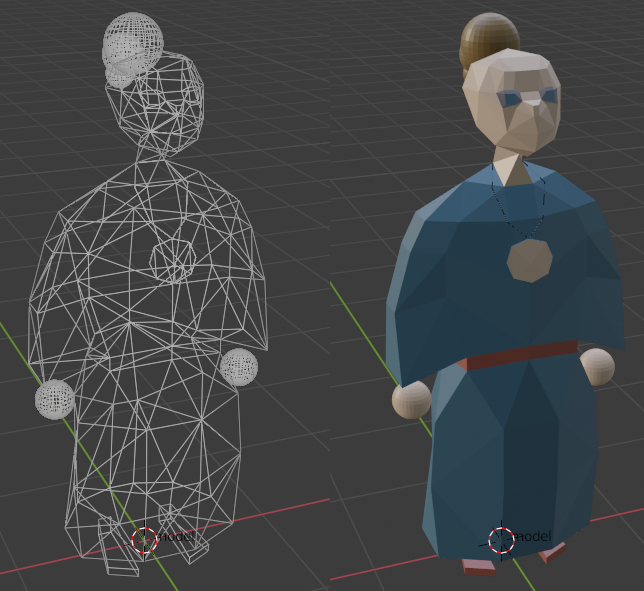
Vertices
These are the smallest elements of a 3D model, basically an array of coordinates that define points in three-dimensional space.
Polygons
Shapes formed by "connecting the dots" between vertices, typically using 3 to 4 of them. These are the surfaces that make up the visible geometry of a model.
Normals
A bit trickier to grasp, normals are invisible vectors that point outward from the center of polygons. They define which side of the polygon is the "front," as most 3D renderers don't display the backside. Each polygon has a corresponding normal.
Lines
Unique to this game's models, these are straight connections between two vertices. Likely used to represent wires, thin ropes, or hair, they're an efficient solution for objects that take up little screen space on a low-resolution 90s display. However, they're problematic for modern displays, where single-pixel lines are nearly invisible.
Spheres
Another game-specific feature, these are rendered in-game as circles that always face the camera. Actually pretty smart of them as in low resolution it looks like a sphere, without spending lots of polygons to draw it. Unfortunately, they're unsupported by standard 3D model file formats, which means we'll need a workaround.
Bones
As the name implies, the actual bones of the model. They are described as vertices with parent-child relationships, you can imagine it like a branching tree, the model's vertices can be assigned to a bone in a process called rigging, so moving the bone will also move the associated vertices.
Textures
We would also need the textures to achieve a perfect representation, but generating the UV mapping isn't something I'm too interested in doing for now. Luckily for us, all polygons, lines and spheres have a colour associated with them, which we will use in place of the textures to get a nicer result.
Understanding the Data
We need some data first! After some research in this wiki, I found the main resource file containing all game actor's 3D models (suggestively named BODY.HQR), but writing a decompiler is low on my priority list, let's use LBA Package Editor for now.
I'm not sure about the origin of the .LM2 file format used to store the individual character models, but thanks to this file specifications, I'm able to decode most of the data without much guesswork. Using a tool such as HxD helps a lot in this step to troubleshoot bad parsing.
I didn't hat a lot of contact with Blender until now, even less with its API, but it didn't take long to get the model vertices to appear, followed by the polygons. Something to notice in Blender (and Maya) is that everything you do in its graphical interface can be seen as function calls in the application console, making it easier to discover the right call to make without searching through the documentation.
Now we need to solve the lines and circles issue, since there is no plan to make this plugin change the original files, I took the liberty of translating the circles into actual spheres, but how to best represent the one pixel thick lines? I'm not sure this was the best solution, but I decided to generate triangular tubes exactly where the lines should be so each line would create only 6 polygons, by using Blender's API primitive cylinder generator it got slightly more complicated than expected since you need to rotate it to match the line vector, as well as length:

Blender
def cylinder_gen(vert1: Vertex, vert2: Vertex, rad):
  dx = vert2.x - vert1.x
  dy = vert2.z - vert1.z
  dz = vert2.y - vert1.y
  dist = math.sqrt(dx**2 + dy**2 + dz**2)

  bpy.ops.mesh.primitive_cylinder_add(
    vertices=3,
    radius=rad,
    depth=dist,
    end_fill_type='NOTHING',
    location=(dx/2 + vert1.x, dy/2 + vert1.z, dz/2 + vert1.y))

  bpy.context.object.rotation_euler[1] = math.acos(dz/dist)
  bpy.context.object.rotation_euler[2] = math.atan2(dy, dx)
One gotcha of this approach: You can't forget to assign the new vertices created by the spheres and cylinders to the assigned bone of the original vertex, since they are not included in the original file's array, and will not be affected by the animations.
Talking about it...
We also need to extract the animations from the ANIM.HQR file, each animation has a header with its number of keyframes and bones, as well as the keyframe number where the animation loop should begin. This is due to some animations having an anticipation motion, such as the start of a run, or the squat before a jump. Inside each keyframe there is a header with its length and the character velocity in three dimensions, followed by each bone position or rotation.
To be able to use all animations correctly in Unity we must split the animation right in its loop entry. Apart from that, most of the values stored in the animation files are pretty much all that's necessary to import to Blender, if we kept using Blender anyway...
Replacing Blender
I'm still not sure if I gave up right before finding the actual solution for this issue, but the animation data was not matching the expected movement.
After some investigation, I found out that Blender rotates bones using the local axis, while the parsed animation data requires the bones to be rotated with a global axis... You technically can rotate bones in Blender using the global axis from the graphical interface, but the resulting Euler angles will be oriented of the local axis anyway, and since we are trying to directly input the Euler angles it will not matter. But there's another software which by default stores angles using the global axis, say hello to Maya. (for 30 days at least...)
I had some experience with Maya from college, not much that I remember now but I'm slightly more comfortable using it than Blender, I was expecting the transition to be smooth since you can code plugins for Maya with PyMEL (an easy to use wrapper for Python), but things got annoying when I found out that Maya is still using Python 2 while Blender uses Python 3.
It didn't take long to downgrade some functions to work with Python 2, such as the built-in method int.from_bytes:
Blender
def u16(self, start_index: hex):
  bytes_to_read = 2
  return int.from_bytes(self.__get_binary(int(start_index), bytes_to_read), byteorder='little')
Which became struct.unpack:
Maya
def u16(self):
  self.currentIndex += 2
  return struct.unpack('<H', self.path.read(2))[0]
However, converting calls to the python wrapper took a while, since there is new documentation to deal with, here's an example of the sphere generator code, written for Blender and Maya:
Blender
def sphere_gen(ob_name, vertx, bone, ball):
  rad = ball.size * world_scale
  bpy.ops.mesh.primitive_uv_sphere_add(radius=rad,
  location=vertx)
  ob = bpy.context.active_object
  me = ob.data

  vg = []
  for i in range(len(me.vertices)):
    vg.append(i)

  group.add(vg, 1.0, 'ADD')
  return ob
Maya
def sphere_generator(source_sphrs, source_verts):
  spheres = []
  for i in range(len(source_sphrs)):
    sphere = source_sphrs[i]
    core_vert = source_verts[sphere.vertex]
    coords = [core_vert.x, core_vert.y,
    core_vert.z]

    poly_transform, poly_sphere = pm.polySphere(
      name="Sphere" + str(i),
      r=sphere.size * WORLD_SCALE,
      sx=settings.sphere_resolution,
      sy=settings.sphere_resolution)
    poly_transform.translate.set(coords)
    poly_transform.rotate.set([90, 0, 0])
    poly_shape = poly_transform.getShape()

    spheres.append(poly_shape)
  return spheres
When working with PyMEL there's almost the same amount of boilerplate code, but building the mesh is a drastically different experience between both tools, as it isn't the kind of scenario PyMEL was made to deal with, so I had to resort to another much less friendly python wrapper, OpenMaya.
Blender
me = bpy.data.meshes.new(ob_name)
ob = bpy.data.objects.new(ob_name, me)
me.from_pydata(coords, edges, faces)

ob.show_name = True
me.update()
Maya
vertex_count = len(source_verts)
face_count = len(source_polys)

vertices = OpenMaya.MFloatPointArray()
for i in range(len(source_verts)):
  vert = source_verts[i]
  vertices.append(
    OpenMaya.MFloatPoint(vert.x, vert.y, vert.z))

face_vertexes = OpenMaya.MIntArray()
vertex_indexes = OpenMaya.MIntArray()
for i in range(len(source_polys)):
  poly = source_polys[i]
  face_vertexes.append(poly.numVertex)
  vertex_indexes += poly.vertex

mesh_object = OpenMaya.MObject()
mesh = OpenMaya.MFnMesh()
mesh.create(vertices, face_vertexes,
  vertex_indexes, [], [], mesh_object)
mesh.updateSurface()
py_obj = pm.ls(mesh.name())[0]
OpenMaya gives access to Maya's C++ API, which has better performance, in exchange for being harder to code with (as can be seen above), this means there are a lot more ways you can break the code requiring more development time and patience.

LBA2Maya
There are still some bugs to fix, the most aggravating one being a rotation issue when an animation rotates more than 360 degrees, it could be understandable since the animations are using Euler angles instead of Quaternions, but as in-game it works fine it most likely is an issue in the way I calculated the bone rotation.
Anyway, you can get the plugin here, it requires Autodesk Maya 2020 and the game data which can be bought from gog.com.
There are multiple ways to install a Maya plug-in, I believe this may be the easiest one:
- Download the lba2Maya folder and place it in a known location.
- Open Maya 2020, go to Windows > Settings/Preferences > Plug-in Manager
- With the Plug-in Manager open, click on Browse and open the file lba2maya.py in the folder previously downloaded
Using it also shouldn't be complicated as I tried to make this plug-in as intuitive as I could, but here are some instructions:
- Before importing models, you need to open LBA2 Loader > Select LBA2 Folder...
- Then, go to the root folder of your LBA2 installation and select it
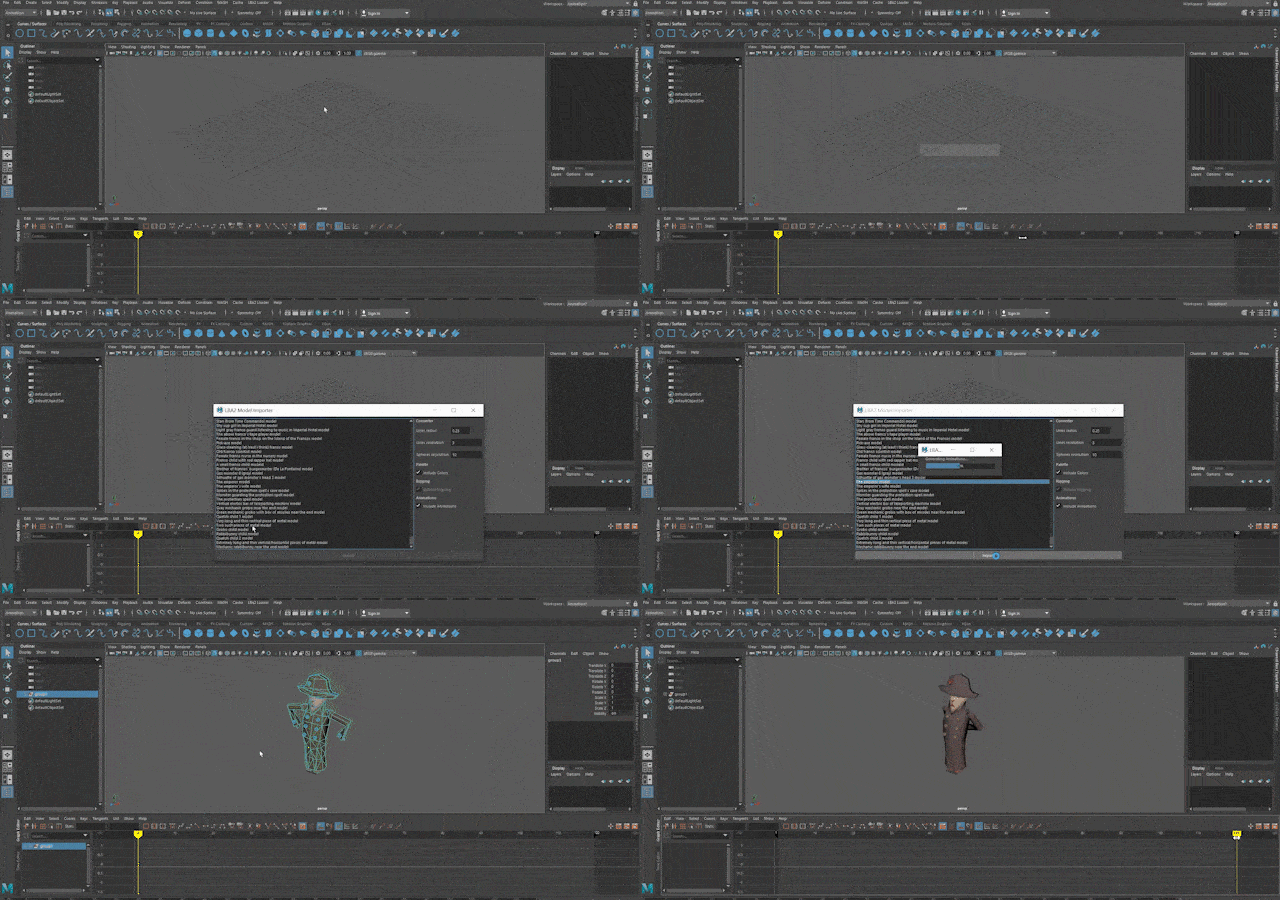
- With the LBA2 folder loaded, you are now able to open the Importer Menu by going to LBA2 Loader > Import Model
You can tweak the line and sphere generator values in the Importer Menu, but I believe the current settings are good enough.
Unity Integration
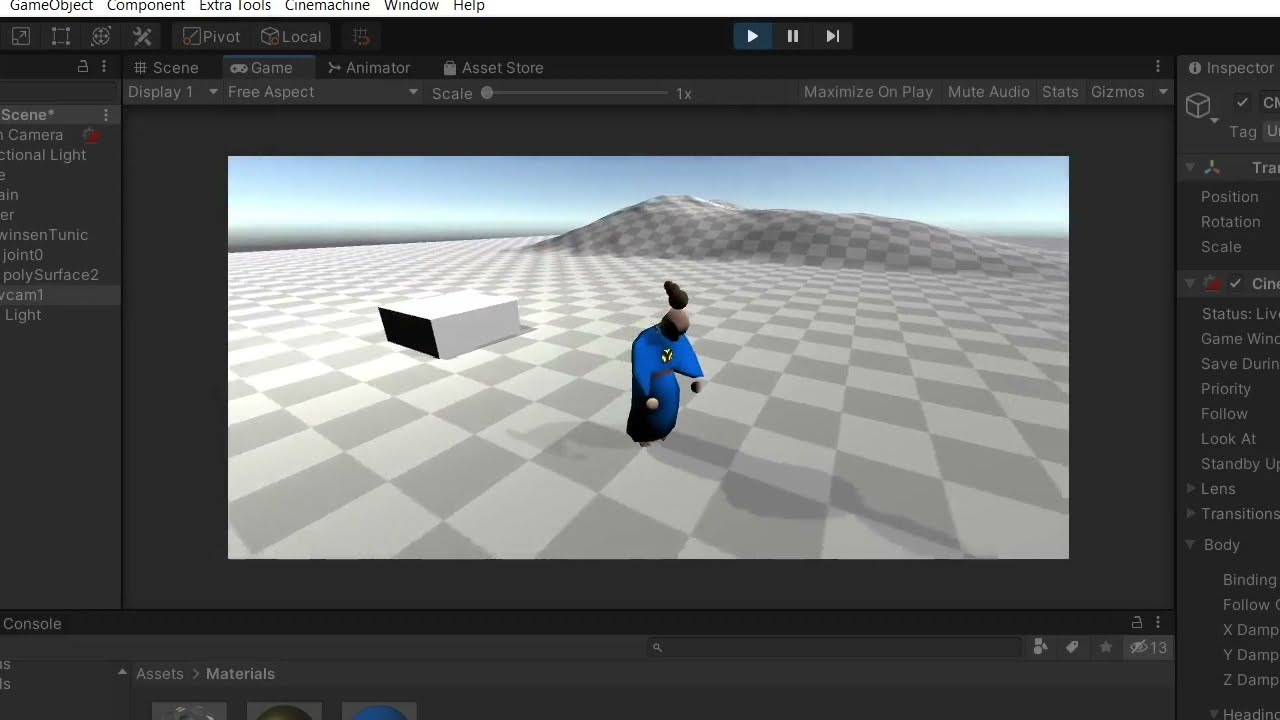
It isn't over yet, after all the purpose of all of this was to make it work in a modern game engine.
Importing the models to Unity is straightforward, but getting the hundreds of animations into Unity isn't so easy, so I came up with this Clip Importer. You need to place it anywhere within your Unity project, but it currently works in a very convoluted way:

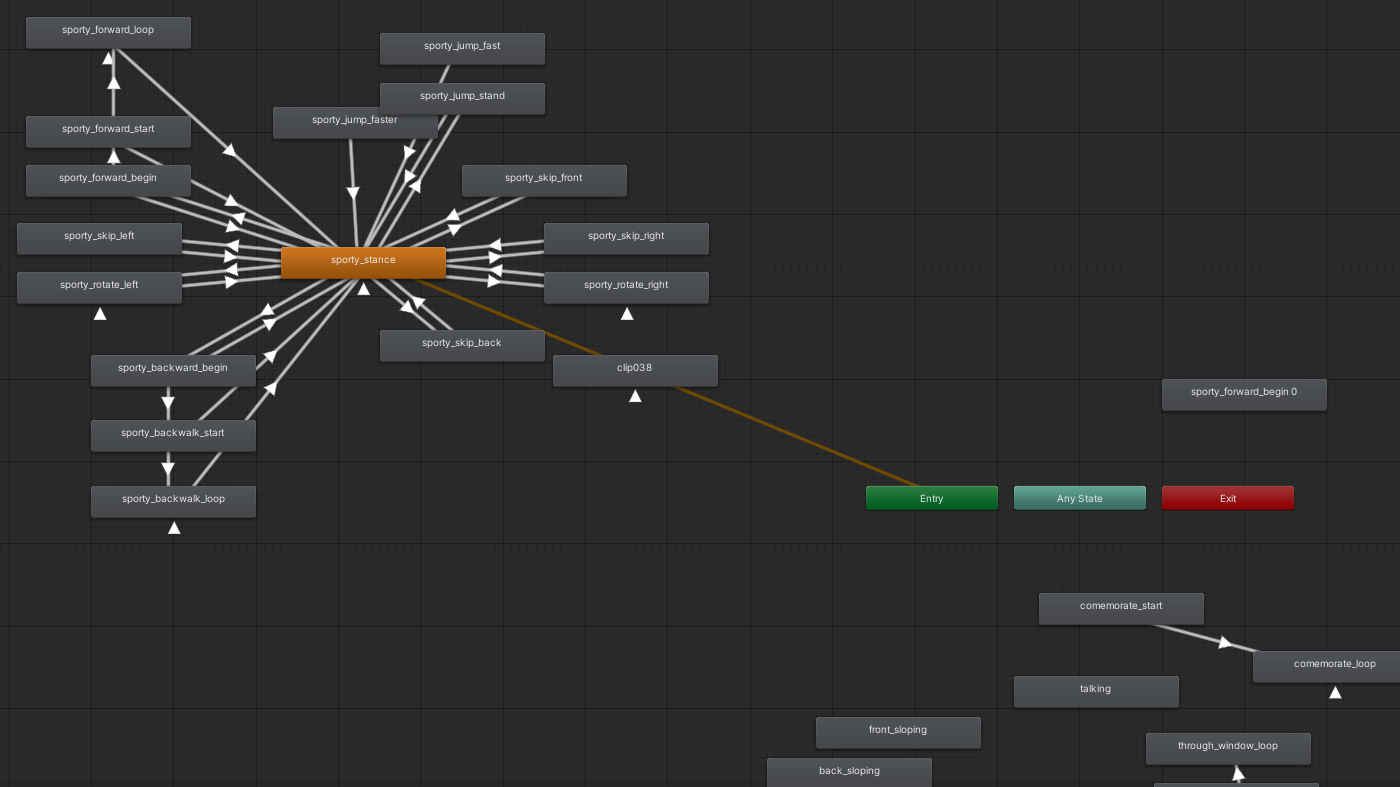
Animator Controller

- When you import a model with my plugin, a long line will appear in the Maya's script editor (something like:
###Start;0.0;0.9…). - Copy this line and save it as a CSV file (just paste it in notepad and it will work)
- Then, you need to export the model with Maya's Game Exporter (Maybe it will work exporting with other means but this is what I used), make sure to select "Export to Single File" and check the box "Animation", you don't need to open the other tabs.
- Save it in the same folder as your CSV file, and then SELECT BOTH the .fbx and .csv files, dragging them simultaneously to the Unity window. The script will kick in and parse the .csv data into the .fbx.
Building an Animator Controller and setting up the character input works as usual after that.
I'd still like to go back to the Blender version and figure out a way of getting it to work, as Maya is quite expensive after the trial ends. But it was a great learning experience anyways!